
Creating visually appealing and functional websites is crucial in the ever-evolving world of web design. One effective way to achieve this is by utilizing static HTML boxes and banners, particularly through the innovative approach of MultiBlocks. This article will guide you through transforming your ideas into reality, focusing on building static HTML boxes and banners using MultiBlocks.
Understanding the Basics
What are Static HTML Boxes?
Static HTML box PrestaShop are fixed content containers on a web page that hold text, images, or other elements. They provide structure to your layout, making information easy to digest. Unlike dynamic content, static boxes don’t change unless manually updated, making them ideal for showcasing details like product descriptions, contact information, or calls to action.
What are Banners?
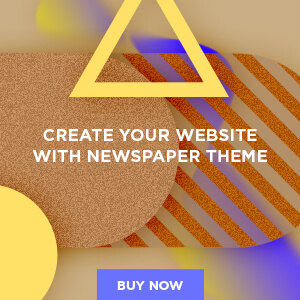
Banners are graphical elements that typically promote content, offers, or announcements. They can be static or dynamic and are often used at the top of a webpage to capture user attention. Banners can include text, images, or animations, providing a versatile tool for engagement.
Introducing MultiBlocks
MultiBlocks is a flexible framework that allows developers to create modular and reusable content blocks. By combining various HTML elements—like text, images, and buttons—MultiBlocks enables designers to craft unique layouts efficiently. This versatility is particularly useful when building static HTML boxes and banners, as it allows for rapid iteration and customization.
Conceptualizing Your Design
Before diving into code, it’s essential to have a clear vision of what you want to achieve. Here are some steps to help you conceptualize your design:
1. Define Your Purpose
Start by identifying the purpose of your static HTML boxes and banners. Are you promoting a product, sharing important information, or encouraging users to sign up for a newsletter? Understanding your goals will guide your design choices.
2. Sketch Your Layout
Create a rough sketch of how you want your boxes and banners to look. Consider the placement of elements, color schemes, and overall aesthetics. This blueprint will serve as your roadmap as you transition to coding.
3. Consider User Experience
Think about how users will interact with your boxes and banners. Ensure that they are visually appealing but also easy to navigate. Clear calls to action (CTAs) are vital for guiding users toward desired actions.
Building Static HTML Boxes
Step 1: Setting Up Your HTML Structure
Begin by creating the basic HTML structure for your static box. Here’s a simple example:
<div class="static-box">
  <h2>Your Title Here</h2>
  <p>This is a brief description of the content you want to display.</p>
  <a href="#" class="cta-button">Learn More</a>
</div>
Step 2: Styling with CSS
Once you have your HTML structure, it’s time to style it. Use CSS to define how your static box will look. Here’s an example of some basic styles:
.static-box {
  border: 2px solid #ccc;
  padding: 20px;
  margin: 20px;
  background-color: #f9f9f9;
  border-radius: 8px;
}

.static-box h2 {
  font-size: 24px;
  color: #333;
}

.static-box p {
  font-size: 16px;
  color: #666;
}

.cta-button {
  display: inline-block;
  padding: 10px 20px;
  background-color: #007BFF;
  color: #fff;
  text-decoration: none;
  border-radius: 5px;
}

.cta-button:hover {
  background-color: #0056b3;
}
Step 3: Implementing MultiBlocks
To leverage MultiBlocks, you can define your static box as a reusable component. For example, if you are using a framework like React or Vue, create a component that encapsulates your box:
React Example:
function StaticBox({ title, description, link }) {
  return (
    <div className="static-box">
      <h2>{title}</h2>
      <p>{description}</p>
      <a href={link} className="cta-button">Learn More</a>
    </div>
  );
}
This approach allows you to use the StaticBox component throughout your application, maintaining consistency and reducing code duplication.
Building Banners
Step 1: HTML Structure for Banners
Similar to static boxes, start with the HTML structure for your banner. Here’s an example:
htmlCopy code<div class="banner">
<img src="banner-image.jpg" alt="Promotional Banner">
<div class="banner-content">
<h2>Special Offer!</h2>
<p>Get 20% off on your first purchase.</p>
<a href="#" class="cta-button">Shop Now</a>
</div>
</div>
Step 2: Styling Your Banner
Next, style your banner to ensure it grabs attention:
.banner {
  position: relative;
  width: 100%;
  height: 300px;
  overflow: hidden;
}

.banner img {
  width: 100%;
  height: auto;
}

.banner-content {
  position: absolute;
  top: 50%;
  left: 50%;
  transform: translate(-50%, -50%);
  text-align: center;
  color: white;
}

.banner-content h2 {
  font-size: 28px;
  margin-bottom: 10px;
}

.banner-content p {
  font-size: 18px;
  margin-bottom: 15px;
}
Step 3: MultiBlocks for Banners
Just like with static boxes, you can create a reusable banner component using MultiBlocks:
React Example:
function Banner({ image, title, description, link }) {
  return (
    <div className="banner">
      <img src={image} alt="Promotional Banner" />
      <div className="banner-content">
        <h2>{title}</h2>
        <p>{description}</p>
        <a href={link} className="cta-button">Shop Now</a>
      </div>
    </div>
  );
}
Testing and Iterating
Once you’ve built your static boxes and banners, it’s time to test their effectiveness. Here are some tips:
- A/B Testing: Experiment with different designs, texts, and layouts to see which versions yield better engagement.
- User Feedback: Gather feedback from real users to identify areas for improvement.
- Analytics Tracking: Utilize analytics tools to track user interaction with your boxes and banners. Look at metrics like click-through rates and conversions to gauge performance.
Conclusion
Building static HTML boxes and banners using MultiBlocks is a powerful way to enhance your web design. By transforming your concepts into code, you can create engaging and functional components that capture user attention and drive action. Remember to prioritize user experience, test your designs, and be open to iteration. With these tools and techniques, you’ll be well on your way to crafting a website that not only looks great but also performs effectively in achieving your goals.
